FREE Tessa Bow!

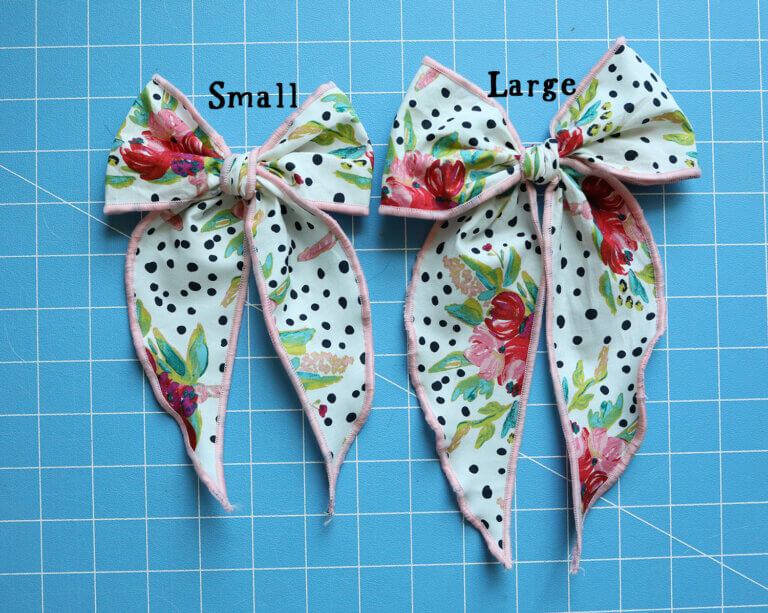
EKKKK! We are so EXCITED to be able to bring you all a FREE pattern! Meet the Tessa Bow! Tessa Bow comes in 2 different sizes, Small & Large. Tessa Bow is a quick and easy make. Tessa Bow requires no sewing besides the sweet, clean rolled hem as a decorative edge. What better thing to have than a free, quick & easy bow pattern to coordinate with every wardrobe combination. Join us below for the free pattern piece download and tutorial! We hope you love it as much as we do!
FREE Tessa Bow Sewing Tutorial
Supplies List:
- 1/4 Yard 44″-45″ Fabric
- Alligator Clips “Click Here”
- Serger or you can also use a 1/8″ rolled hem foot for your sewing machine
- Serger Thread
- Wooly Nylon Thread or (Stretch Thread) “Click Here”
- Chalk or Fabric Pen
Approximate Finished Measurements:
LARGE: Approximate finished measurement (this may vary): across from bow loop to bow loop.
WIDTH: 5 3/4″
From bow loop to the bow tail point.
LENGTH: 9 3/4″
SMALL: Approximate finished measurement (this may vary): across from bow loop to bow loop.
WIDTH: 5″
From bow loop to the bow tail point.
LENGTH: 8″
How to Thread Your Serger for a Rolled Hem:
Video brought to you by: Craftsy.com
Creating the Bow:
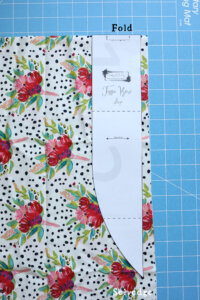
Step 1. Begin with 1/4 yard of folded fabric. 44″-45″ width. Place the pattern piece on the fold. Cut one.

Step 2. Open up the bow pattern piece. Locate the curved edge and straight edge. Beginning with the straight edge and curved edge on your left, sew a few straight stitches, forwards and backwards, 1/8″ away from the raw straight edge. Before clipping your threads pull the threads out of the machine creating thread tails. You will need these to hold onto as a guide in the next step.
Step 3. Next, guide the straight edge of the bow with the thread tails under the presser foot of your serger. Stop the bow point right before the needle. Lower the presser foot down. Begin sewing by pulling taut on the thread tails guiding the straight edge of the bow, creating a rolled hem. Be sure to leave extra thread for thread tails once you have reached the opposite end of the bow. You will use the thread tails as a guide in the next step.
NOTE: Disengage the serger knife. You will not trim the fabric with the knife. Only roll about 1/8″ of the fabric edge under. See pic below.
See pic below for how much to roll under. Referencing the NOTE above.

Step 4. Now guide the curved edge of the bow with the thread tails you just created, under the presser foot of your serger. Stop the bow point right before the needle. Lower the presser foot down. Begin sewing by pulling taut on the thread tails and tautly stretching the curved edge as you sew. Repeat when you reach the opposite end of the bow. This will create the wavy look around the curve of the bow tails.
Step 5. Trim the excess threads at the bow points. Next, turn the bow over with the wrong side of the bow fabric facing up and the straight edge of the bow on top and the curved edge of the bow on the bottom. Locate the center of the bow and place a mark with a chalk or fabric pen. On the left side of the center marking, measure 2″ away from the center marking and place a mark with a chalk or fabric pen.
Tying the Tessa Bow:
To view the video instruction on how to tie the Tessa Bow, Scroll down and press play!
Step 6. With the wrong side of the bow facing up, locate the top of the curve using your best judgment. Pinch along the top of the curve. Bring the pinched area over towards the center of the bow. Place the pinched area on top of the 2″ marking from the left of the center of the bow with the bow tails directed downward (curved edge of bow tail on your left and straight edge of bow tail on your right). Keeping the fabric pinched, pinch along the 2″ marking. Pick the pinched area up into your hand with the pinched area between your left hand thumb and left hand index finger.
Step 7. Now pull the right side of the bow over the pinched area of the left bow loop. Next, wrap the right side of the bow around to the back of the bow under the left bow loop. If you notice now, the wrong side of the right bow tail is facing the back of the bow. We are now going to make one twist towards the right hand side (counter clockwise). The right side of the fabric is now facing the back of the bow.
Step 8. A few inches up from the center of the bow on the right bow tail keeping the twist in place, fold bow tail in half. Guide the fold of the loop that you just created on the right bow tail, through the loop in the center of the bow. Pull through to the other side of the loop. Pull taut on both of the bow loops tightening the bow. You may have to mess with the bow a few times to get it just right or how you like it. You can do this by pulling on the loops and bow tails and re tightening the center. To finish the bow off, turn the bow over to the back of the bow. Press open the alligator clip and slip the teeth side of the clip under the back center loop of the bow until the clip is centered. For extra security you can place hot glue under each end of the metal alligator clip.
Congratulations!
You now have created the Tessa Bow!

Video Instruction:
Click play to view the video instruction on how to tie the FREE Tessa Bow!
XOXO,

